I started a seasonal job today and I'll be working six days a week, 7+ hours a day, so I've been frantically trying to finish this blog. Eek! I actually ran out of time this year. With the PTA keeping me out of my kitchen/home and working me more hours than when I actually got paid to work...now, I have a full time job for the next four weeks. So naturally, I'm not going to be able to blog much. I'll be getting home at sunset and won't have time to cook let alone have daylight to take photos. A. Complete. Bummer. :( No blogging? Bad. Having a job, that pays? Good! Anyway, here's a little peek at my house this fall. I didn't finish all the decorating I wanted this year so you'll see some of those ideas next year. Take a look around and enjoy! :) I'll be back from my blogging hiatus in Mid-December.
Fall Leaves Artwork I had a date set with my best friend, Julie to scrapbook two weeks ago and I was frantic because I had no idea what I was going to scrap. Julie lives nearly 35 miles away so I usually pack up my supplies with a particular project in mind. Since I was two years behind on scrapbooking my boys' photos and I was hard pressed to find a current picture of my boys...I was desperate to make something. So instead of scrapbooking my kids, I ended up making this Fall inspired artwork.
A few years ago I picked up some Martha Stewart die cut leaves on clearance and some clearance paper. I made both of these for less than a dollar! Confession...I spent a little more on the frames however, and I think they turned out great! Don't you? I may just leave them up all year!  EntrySimple welcome sign and pumpkins frame my door. A wreath from last year and a small bucket of fall foliage hang on the wall. Simple and lovely. BuffetThis year I keep the ceramic pumpkin collection in storage and instead opted for real pumpkins inside and out. Here's a peek at my dining room. :) SideboardThese brown and orange candles were the inspiration for this arrangement. I picked up these candles on clearance for about a $1.50 each over the summer at Kohl's. Regularly priced at 6.99 each. Such a steal! Happy Thanksgiving!Other Decorating Ideas:Fall Decorating 2013Halloween Decorating 2014Halloween Decorating 2013
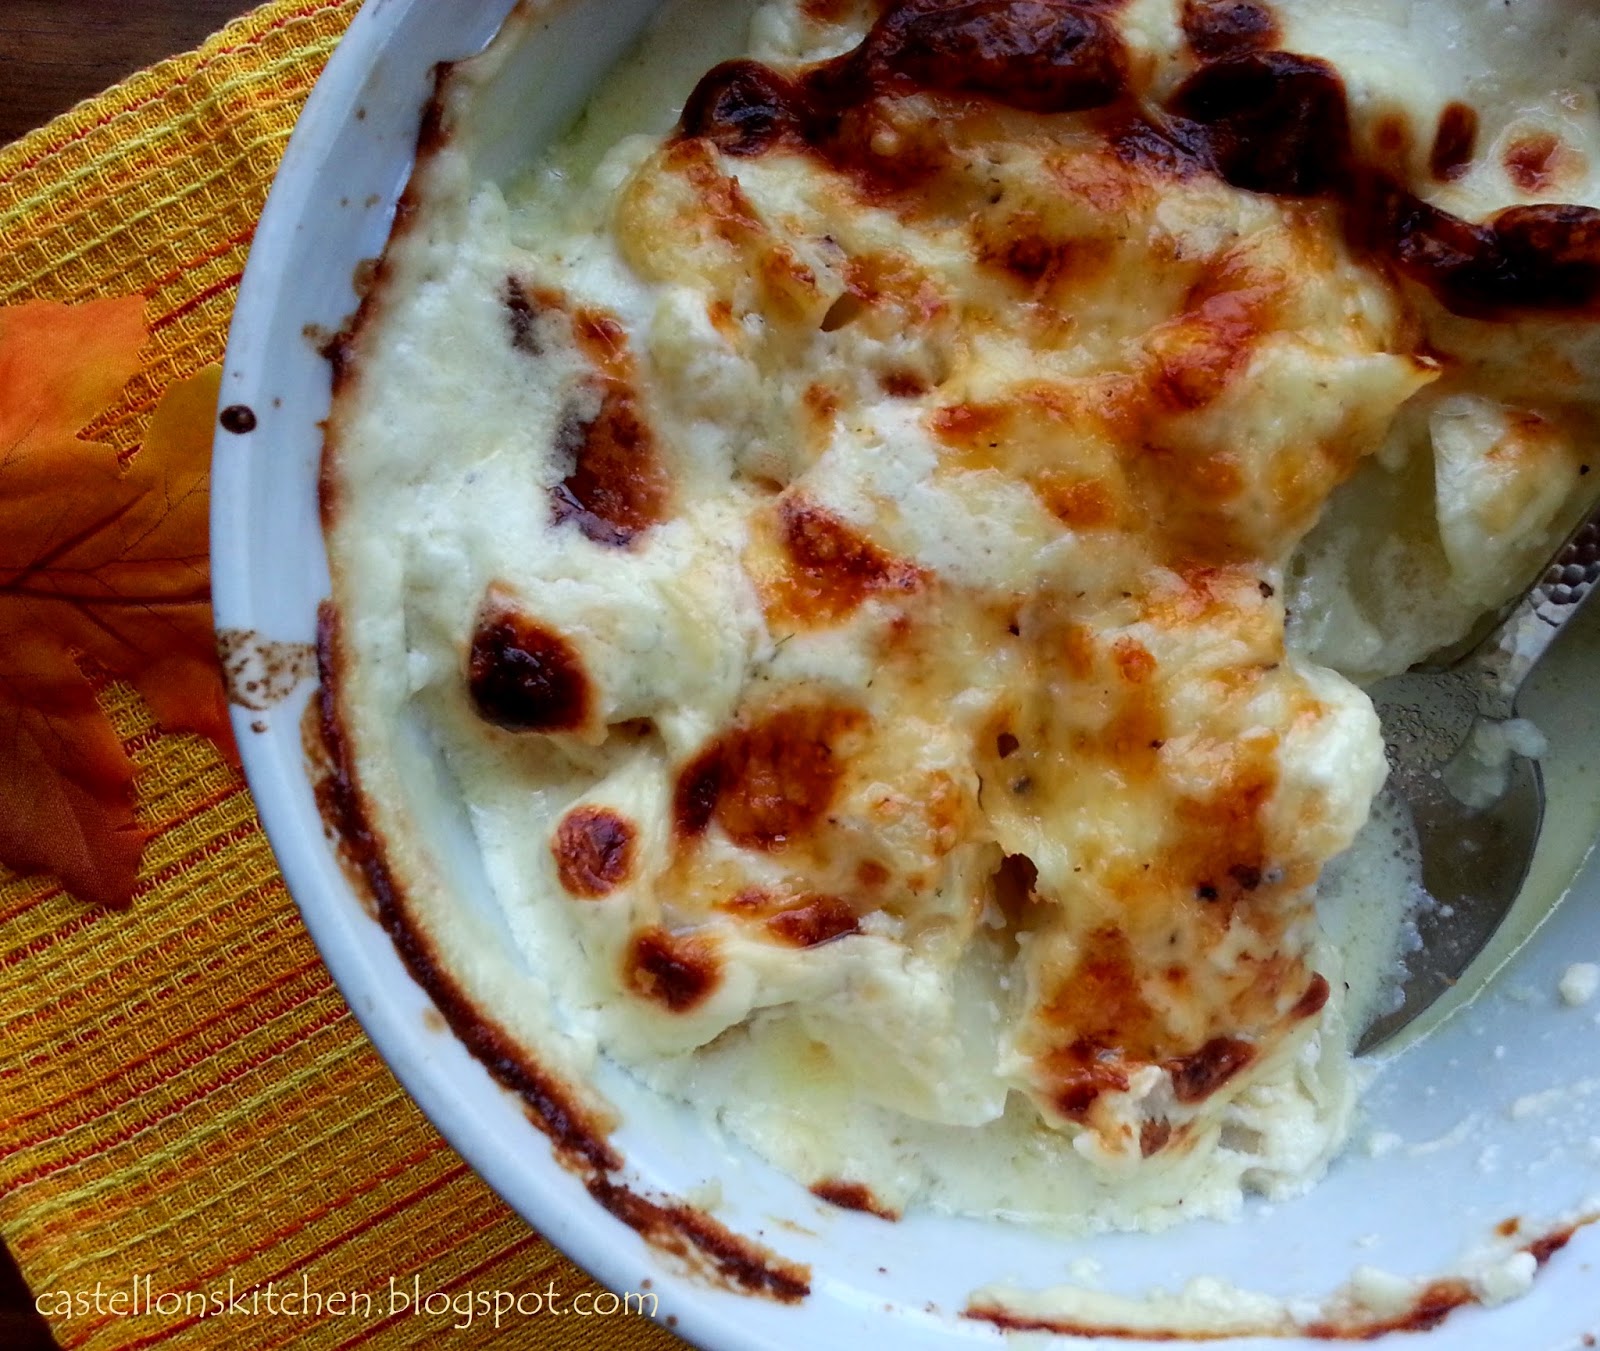
It had been about three weeks since I'd last talked to my mom. Daily life, weekends brimming with things to do, obligations, homework and all around exhaustion taking hold at the end of each day prevented us from talking as frequently as we would've liked. So last Saturday was the day we scheduled to be able to talk and catch up. Yes, we actually had to calendar the phone call. My husband and the boys were at an early morning Cub Scout event and I was out running errands when she called. I was expecting her call even though I was at the grocery store. It was early and there weren't too many folks there at that time of the morning. But despite my opinion that people who talk on cell phones in public are rude, I was one of those rude people. It couldn't be helped or rather at least I didn't care all that much if I was being rude. I wanted to talk to my mom. We talked and talked as I shopped the aisles. The epitome of rudeness, I know. Yeah, I even checked out with my phone stuck to my ear, completely ignoring the checker! Yikes.We talked and laughed as I made my way home. (Hands free of course!) We talked about my boys, talked about the food, what we got on sale, and the new recipes we'd tried recently. What was good. What wasn't. She told me about this recipe, from Cuisine at Home that she adapted by adding cauliflower along with the potatoes to this Potato Gratin to make this amazingly delicious Potato and Cauliflower Gratin! The original recipe calls for Swiss cheese, which I didn't have at home, but she told me that she just uses any cheese she has on hand. So I used a blend of Asiago, Havarti and White Cheddar, since I had a little bit of each and it was incredible! Can't go wrong with Asiago and Havarti cheeses! I made these creamy, cheesy, yummy potatoes that night and it was just what I needed to soothe my weary soul, comfort food and a long phone call with my mom. The perfect day! Thanks Mom, I love you. Potato and Cauliflower Gratin (adapted recipe from Cuisine at Home)Makes 8 cups
6 cups potatoes, cut into even chunks2 cups cauliflower, cut into even pieces 1 1/2 c. heavy cream1 1/2 c milk1/2 cup onion, diced1 T garlic, mincedsalt, pepper and nutmeg to taste1 cup Swiss cheese (I used Asiago, Havarti and White Cheddar)
Preheat oven to 450 degrees.Bring potatoes, milk, cream, onion, garlic, and seasonings to a boil in a large saucepan. reduce heat to medium-low and simmer for 10 minutes. Layer half the potatoes and cauliflower in a greased, 4 quart casserole dish and top with half the cheese. Repeat layering: pour milk and cream mixture on top. Bake, uncovered, for 25 minutes, or until potatoes are cooked through. Let stand 10-20 minutes before serving.
I'm not a big fan of stuffing which isn't so good this time of year when stuffing and dressing recipes are everywhere. I am a fan of onions however. Especially grilled, sauteed, caramelized, pickled, fried and creamed onions. Oh my! Yummy! Here's one of my mom's recipes that strikes a perfect balance between a dressing and a casserole with onions as it's main ingredient.:)I prepared this dish two ways. The first time, for those onion lovers like me, I made it like my mom's recipe, with the stuffing layer topped with delicious sauteed onions, cheese. I changed my mom's version just a bit by adding some crispy French fried onions to the stuffing layer and to the top. The second time, I made it with my kiddos in mind. I wanted to hide all those onions so I mixed the stuffing and onions together to make a dressing of sorts. I still topped it with cheese and french fried onions. Both versions of this casserole were absolutely delicious! I ate them both for breakfast and lunch for three days in a row! Enjoy!Happy Thanksgiving!
Sweet Onion Casserole Serves 6
3 c. Vidalia onions (yellow onions can be substituted)1 c. Stove Top Savory Herbs Stuffing Mix1/2 c. plus 1/4 c. French's French Fried Onions 1/4 cup butter plus 2 T. butter2 eggs3/4 cups milksalt and pepper3/4 c. shredded cheese (I used Cheddar and Asiago)
Preheat oven to 350 degrees.
Cut onions in quarters and slice very thin. Melt 2 T butter in a large skillet. Add onions and saute until tender about 8 minutes. Set aside.In a large bowl, add Stuffing Mix and 1/2 cup of French Fried Onions. Melt 1/4 cup of butter and pour over the stuffing/fried onion mixture. Transfer stuffing/French's Fried Onion mixture into a 1 quart casserole dish and spread evenly on the bottom of the casserole dish. Now layer the sauteed onions on top of the stuffing mixture. Mix eggs, milk, salt and pepper. Pour egg mixture over the stuffing/onion layers. Sprinkle with cheese and bake for 25 minutes. Remove from oven and sprinkle additional French fried onions and more cheese and bake for an additional 5 minutes. Enjoy! (Note: For our kiddos that don't like onions, here's a more kid-friendly version that hides the onions. Mix the stuffing, fried onions and sauteed onions together and then transfer into a 1qt casserole dish. Add milk/egg mixture, top with cheese and bake as directed above. This version has a more stuffing-like consistency. Equally delicious, but the onions are less obvious! See picture below)Other recipes to try:Parmesan Creamed OnionsTortilla Dressing
Two weekends ago we finally had a small bout of actual fall weather, which surprisingly enough, came with a full day of rain. Yay! For us here in Southern California, it was a nice departure from our endless hot days that it got me in the kitchen to make two comforting fall dishes. The first one being my mom's recipe for this delicious Mustard Braised Chicken. I love Dijon mustard and this sauce is absolutely to die for. The flavors of the sauce are so complex with the layers of thyme, rosemary and marjoram bending with the Dijon, onions and wine...one word, Amazing!
Stay tuned for the second recipe. I made an adapted version of my mom's Sweet Onion Casserole that's completely addicting. I ate it for breakfast for three days in a row. It's the perfect side dish for Thanksgiving...or even breakfast! :)Enjoy!
Mustard Braised ChickenServes 4
3 T olive oil, divided2 T minced fresh thyme, divided3 t. minced fresh marjoram, divided1 1/2 t. dry mustard1 t. minced fresh rosemary,divided3.5 lbs chicken, cut into 8 pieces (I used thighs and legs) salt and pepper
1 1/2 cups finely chopped onion2 T minced garlic1 cup dry white wine1 cup low sodium chicken broth6 T Dijon mustard
Stir 1 T olive oil, 1 T thyme, 1 1/2 t each of marjoram, dry mustard and 1/2 t of rosemary in a small bowl until a paste forms. Rub paste all over chicken. Place in a bowl and chill 2 hours or overnight.
Heat 2 T olive oil in heavy large pot over medium high heat. Sprinkle chicken with salt and pepper. Add chicken to pot and cook until brown on all sides, about 12 minutes. Transfer to a bowl.Add onions to the pot, saute over medium high heat until tender, about 8 minutes. Add garlic; saute 2 minutes. Add wine, broth, Dijon mustard and 1 T Thyme, 1 1/2 t marjoram and 1/2 t rosemary to pot. Bring to boil. return chicken to pot, reduce heat to medium-low. Cover and simmer until chicken is cooked, about 25 minutes.
Transfer chicken to a plate and cover to keep warm. Reduce liquid in pot until thickened to sauce consistency, whisking often, about 15 minutes. Pour over chicken. Other recipes to try:Pork Tenderloin with Mustard-Caper SauceCorned Beef Rolls with Mustard Cream Sauce
IT'S THE MOST WONDERFUL TIME OF THE YEAR! My favorite holiday and my favorite season has finally arrived. If you've followed me all summer, you already know that I plan all year for this time of year. I spent most of my summer, cooking fun and festive Halloween inspired food and designing decorations for my home. This year my decorating focus was skeletons. I have lots of parts and pieces of skeletons and I wanted to incorporate them in fun, unexpected ways, like a Skull Topiary, Gravedigger centerpiece (pictured above) along with my Skeleton Wreath and a super fun, Remains of the Day Chalkboard. I also decorated my sideboard with a spooky Haunted Hamlet made with old Christmas Houses and a Halloween inspired work of art, I affectionately named, Witch's Broom. And finally, I can't let the season go by without making another wreath, this one made with tons of creepy crawly spiders! Eek!Take a look around and enjoy. HAPPY HALLOWEEN!Skull Topiary
I actually bought these skeleton arms on sale for $5.00, which may not sound like such a deal. It was a deal because the arms came with legs and a head as well. The original decoration was meant for the front yard. The arms, legs and head came with spikes so you could stick them into the ground so that the skeleton appears to be coming out from the ground. I used the arms and head in this creation and I used the legs in my Gravedigger Centerpiece below. I had an old floral container which I spray painted flat black. I had some creepy cloth from last year, but I always buy more each year. You can never get enough Creepy Cloth. First, I stuck the arms into floral foam in the container and since these arms were rigid at the elbows and pivoted at the wrists, I used a small amount of creepy cloth to bind the wrists together allowing the hands to fall open and then glued the head in the hands. I added the three accent roses and then I added two other smaller foam skulls, that were attached to different sized bamboo skewers, to vary their height. I built from there adding black roses and some purple glitter berries and finishing it off with silver plastic ferns. Turned out pretty cool huh? Gravediggers Centerpiece
This little gal was a sketch in my blog notebook all summer. I have a few notebooks where I jot down recipe ideas and decorating ideas, but I had her in mind all summer and I am so happy she came to life from a scribble. I love this decoration because it has so much detail. You really need to look to see all that's going on with her. Her disjointed limbs and scattered bones lie together at the base of a tombstone overgrown with fall foliage and wild pumpkins. The spider on her grave looms over her shrouded head and another at her feet as a raven stands perched on a wrought iron fencing that lies behind it all. The vignette is complete with my Skeleton Wreath from a few years back and some rustic ceramic pumpkins. I'm ready to greet the season!
Remains of the Day Chalkboard

I made this fun chalkboard with a left over piece of wood, plastic bones, chalkboard paint, and some construction adhesive. It's was super easy to put together and looks great in my dining room. For Halloween I'll post my menu of: Amputated Appetizer, Mummified Meatloaf, Roasted Fingers and Toes, and 'Beet'ing Hearts Salad with Blood Red Vinaigrette. "Bone" Appetit! Here's a picture of it at night. So pretty with the glittery mercury glass pumpkin, candlestick and tea lights! Spider Wreath
Here's another simple decoration to put together. I made this wreath by gluing a bunch of different sized spiders onto a spray painted grapevine wreath and then wrapped it all in black spider webs. Easy and looks great!
Witches' Broom
This is my Halloween themed artwork named Witches' Broom that was inspired by the idea of using dictionary pages as a canvas. The pages are not just a neat backdrop, they are actually what makes this drawing Halloween themed. I chose words and pictures from the dictionary that captured the essence of the season, such as vampire, werewolf, tarantula, ghosts, etc. I think it turned out really cool and it looks great hanging in my dining room. If you want to see how it came together check out my blog link here.Haunted Hamlet
This was so much fun to make and again, really simple to do. The hardest part was finding all the right sized Christmas houses, especially in the middle of summer. I scoured every thrift shop for a few weeks before I was able to pull it all together. I even added a house after I wrote and posted the blog when a friend found and gave me another house to add to my village. Check out the Haunted Hamlet blog to see how I made it.
HAVE A SAFE AND HAPPY HALLOWEEN!Other Halloween Decorating and Entertaining Ideas:Halloween Decorating 2013Fall Decorating 2013
Halloween-inspired recipes:Spiderweb Eggs, Fangtini, Amputated Appetizer, Pickled Shrunken Heads, Ghoulish Goat Cheese Torte, , Black Bean Hummus, Candy Corn Sugar Cookies, Candy Corn Peppermint Patties and Black Velvet Creme Cakes!
I must sound like a broken record lately when I say that I've been too busy to blog, but I have been too busy. Since I took on the PTA at my boys school, it has been the only thing I've been giving my time and attention to since August (i.e. no blog posts at all in September.) I figured this would happen since I'm new to the role and it has taken me a while to get things going. This is also why I spent all summer blogging my Halloween recipes. I wanted to get a jump on the Halloween season knowing full well that I wouldn't have much time once school started. But now that things are beginning to slow a bit, I'm anxious to get back in the saddle and ride out the remaining days to Halloween with a few more Halloween inspired dishes. Starting with an appetizer course of these deliciously beautiful and fantastically festive Spider Web Eggs! You can tell right away these are not your typical Deviled Eggs with its cool looking egg whites veined with bright purple and blue spider webs along with it's bright green filling with the flavor and spice of guacamole. Dare I say, a healthier choice in fat, the avocado replaces the mayo and is heavily spiced with cilantro, garlic, onion, cumin and cayenne. Delicious! Then I topped the whole thing off with crushed Blue Corn Chips, which was just what all that rich guacamole filling needed! Check out this easy and delicious recipe that will most certainly impress your guests at your next Halloween Party. Happy Halloween! Spider Web Eggs (Guacamole Deviled Eggs) Makes 12
6 eggs, hard boiled1/4 t purple gel food coloring in waterBoil eggs. Cool under running water and refrigerate for about 4 hours or overnight. Remove eggs from the refrigerator and using the back of a spoon, tap the shells in various places. This is what gives you the spiderweb pattern. Into a large bowl and add enough water to cover the eggs and add the gel food coloring and mix well. Add eggs to colored water and Refrigerate the eggs overnight. Drain water and peel the shells to reveal the cool spidery webs of color. This is the most fun part of this recipe. The eggs are stunningly beautiful. I may never color Easter eggs the same way again. Cut eggs in half, place yolks in a food processor and continue to prepare the guacamole egg filling below. Place egg white halves in single layer in a shallow dish and refrigerate until ready to assemble.
Guacamole Egg Fillingyolks of 6 hard boiled eggs1 avocadojuice of one lime 1-2 T cilantro leaves1/2 t onion powder1/2 t garlic powder1/4 t ground cumin 1/4 t cayenne pepper (to taste)salt to tasteBlue corn chips, crushed (garnish)In a food processor, blend yolks, avocado, lime, and herbs and spices until very smooth. Transfer into a piping bag with a star tip and pipe into spiderweb eggs and garnish with crushed blue corn chips or red pepper flakes (not pictured) or even top with your favorite salsa for a bloody effect. Enjoy!HAPPY HALLOWEEN!  Other Halloween inspired dishes to try:Ghoulish Goat Cheese TorteAmputated AppetizerFangtini (Blood Orange Martini)
What do you get when you take the martini and combine it with a *Bag of Bloody Fang Halloween Candy? The Fangtini, of course!
Martini's are the coolest cocktail around if you ask me. What's not to like... It's served in a way cool glass! It has yummy accompaniments, like olives, apple slices and cherries which often serve as a lite-meal during happy hour. ;)Plus, there are tons of variations to suit everyone's taste...The Appletini, Dirty Martini, the Cosmopolitan, Lemon Drop...just to name a few. But above all, I think it's because the martini is strong and it is meant to be sipped. Savored. A martini cannot be rushed and that, in and of itself, is way cool. So throw on your costumes, invite a few friends over and mix up a Fangtini and savor the Halloween season. Happy Halloween!Enjoy!
 *The idea for this cocktail was inspired by the Bloody Fangs Sour Candy, but you do not need this candy to make the Fangtini. However, you'll need to invest in vampire teeth to garnish your glass. :)Fangtini (Blood Orange Martini) Makes 2
2 oz. Vodka (I use Ciroc Peach Vodka)1/2 oz. Grand Marnier2 oz. Blood Orange Juice (or Blood Orange Soda)splash of cran-blueberry or cran-grape juice (to deepen the color) IceFake Blood (to rim the glass)
Fake Vampire teeth (garnish) Combine ingredients into shaker with ice and shake. Pour into blood rimmed glasses and garnish with fake vampire teeth.Fake Blood for the Glass 1/4 cup light corn syrup1/4 t of red gel food coloring Mix fake blood ingredients on a small plate until well combined. Dip martini glass rim into the syrup. Twist the glass to remove and then place upright to allow for the fake blood to begin to drip down the inside of the glass. Halloween Appetizers to try:Pickled Shrunken Heads Amputated Appetizer Ghoulish Goat Cheese Torte