Saturday, November 7, 2015

Crockpot White Bean, Sausage and Kale Soup


October went by way too fast this year. It went by so fast that I never finished decorating my house for Halloween. :( We held a big Halloween Carnival at my boy's school so my time, attention and decorations were focused on that event. I was responsible for the Zombie Maze. We transformed the school cafeteria into a Haunted Maze, got volunteers to dress in character and scare kids. It was great and the kids and adults loved it! My photos didn't turn out so great but I'll blog about the maze in the near future after I try to belatedly finish a Halloween decorating blog this weekend. :)

Anyway, fall is finally here (as in cooler weather) and I'm neck deep in yummy comforting fall recipes. Crockpot White Bean, Sausage and Kale Soup is one of those easy, delicious recipes that cooks itself. Throw it all in and forget about it. Perfect for those long workdays or cool weekends watching football. Enjoy!

White Bean, Sausage and Kale Soup

Serves 4-6

2 cups dried white beans, soaked overnight
1 Kielbasa sausage, sliced and pan-fried
1 small red pepper, diced (~1/2 c)
1 medium carrot, diced(~1/2 c)
1 small yellow onion, diced (1/2 c)
4 cloves of garlic, minced
2 cups kale, roughly chopped
2 bay leaf
1 t. smoked paprika
1/2 t. thyme, dried
1/2 t. Italian seasoning, dried
1 t. kosher salt
pepper (to taste)
6 cups chicken broth


Soak 2 cups of dried white beans overnight. Drain water and place beans into slow cooker.
Pan fry kielbasa sausage until browned and drain about half of the rendered fat. Add sausage to slow cooker.
Add remaining ingredients. Stir and set slow cooker to low and cook for 6-7 hours. Enjoy!
  
Other soup recipes to try:
Spicy Slow Cooked Beef Stew            Rustic Minestrone                             Tomato Garlic Soup

Friday, November 6, 2015

Creole Beef Grillades

I woke up cold and reached for a blanket that wasn't there. The summer heat continued well into fall so I had't pulled the blankets out of the closet. Unable to warm up, I got out of bed, looked at the clock, and I was instantly happy. Not just about finally getting cooler weather but because I realized I'd slept through the night for the first time in months! It was after 6 A.M. Hooray! My usual night time routine was to wake up at 3-4 A.M. no matter the time I went to bed...and I STAY awake. I'm completely unable to fall back to sleep. It sucks! 


But today, I felt renewed and rested. Also, I was excited because I was home from school today. No PTA. No volunteering. No meetings. No problems. No people. Just time for me! Time in my kitchen. Time in my home. Time to tend to the things that I enjoy...Time to cook!And cooking is what I did. 
I made these ridiculously delicious Creole Beef Grillades. I experimented with this idea a few weeks ago with a cheap cut of beef and it turned out amazing.

I see a lot of affordable cuts of beef at the grocery store but I'm always unsure as how to cook them and have them taste good. Of course braising is the only way that came to mind for cheap cuts but I wanted something with a flavorful punch that's not spicy hot.  I tend to make food spicy for flavor, but I didn't want this meal to be spicy...I wanted my kids to eat it. Creole flavors came to mind. So with a full shaker of Creole seasoning in my cupboard and some beef chuck steaks, this is what I came up with.  
The ultimate cold weather comfort food. Happy Fall!  

Creole Beef Grillades

Serves 6

6-8 beef chuck steaks
1 c. flour with a generous amount of Creole seasoning (for dredging)
3 T olive oil, divided
1/2 c. medium onion, diced
1/2 c. red bell pepper, diced 
1/2 c. celery, diced 
2 cloves garlic, minced
1 c. red wine
3 T tomato paste
2 c. beef broth
2-3 bay leaves
2 T Creole Seasoning
pepper (to taste)

Preheat oven to 350 degrees.

Dredge steaks in flour/Creole seasoning mixture and set aside.

In a large skillet, add 1 tablespoon of olive oil, onion, celery, red bell pepper and garlic and saute until onions are translucent, about 5 minutes. Remove vegetables from pan and set aside. Add remaining 2 T olive oil to the skillet and over high heat, brown the steaks about 5 minutes on each side. Remove steaks from skillet and place in a roasting pan.

Prepare Braising Gravy 
De-glaze the skillet with red wine, scraping any bits from the bottom of the pan. Add the tomato paste, beef broth, bay leaves, Creole Seasoning and sauteed vegetables and heat to a simmer. About 8-10 minutes. 
Pour the gravy mixture over browned steaks in the roasting pan. Cover with aluminum foil and bake in a 350 degree oven for 1.5-2 hours or until meat is tender. (Time will vary depending on the thickness of the steaks.) 

Remove from oven. Let rest for 10 minutes and serve over mashed potatoes or Grits for authentic Creole fare. Generously ladle gravy over the top and enjoy!
 
Other recipes to try:
Braised Short Ribs             Honey Butter Chicken               Greek Meatballs

Sunday, October 11, 2015

Pumpkin Spice Latte Ice Cream


With so much hot weather in Southern California these first three weeks of autumn, I'm feeling frustrated that it's too hot to curl up with a good book and blanket and sip on pumpkin spice lattes. What's this fall-loving girl supposed to do when I have to endure the opposite of fall weather every day...Well here it is! The perfect compromise of warm weather relief with fall flavor. Pumpkin Spice Latte Ice Cream!
This has got to be the best find of the year. I saw this recipe for three-ingredient ice cream on Facebook and it inspired me to try it at home with one of my favorite seasonal instant coffees, Maxwell House's Pumpkin Spice Latte. I know it may not be a Starbucks Latte but for this girl on a budget and no time to wait for thirty minutes for a fancy coffee...this is the next best thing!

This is an insanely easy and delicious Pumpkin Spiced Latte Ice Cream! It contains no eggs, so it's lighter tasting. Which I find refreshing, especially with all this hot weather. Just to put it in prespective how hot it got in the Los Angeles area yesterday, it was 102 degrees in my neck of the woods. We were hotter than Las Vegas and Dallas! It was ridiculous!  
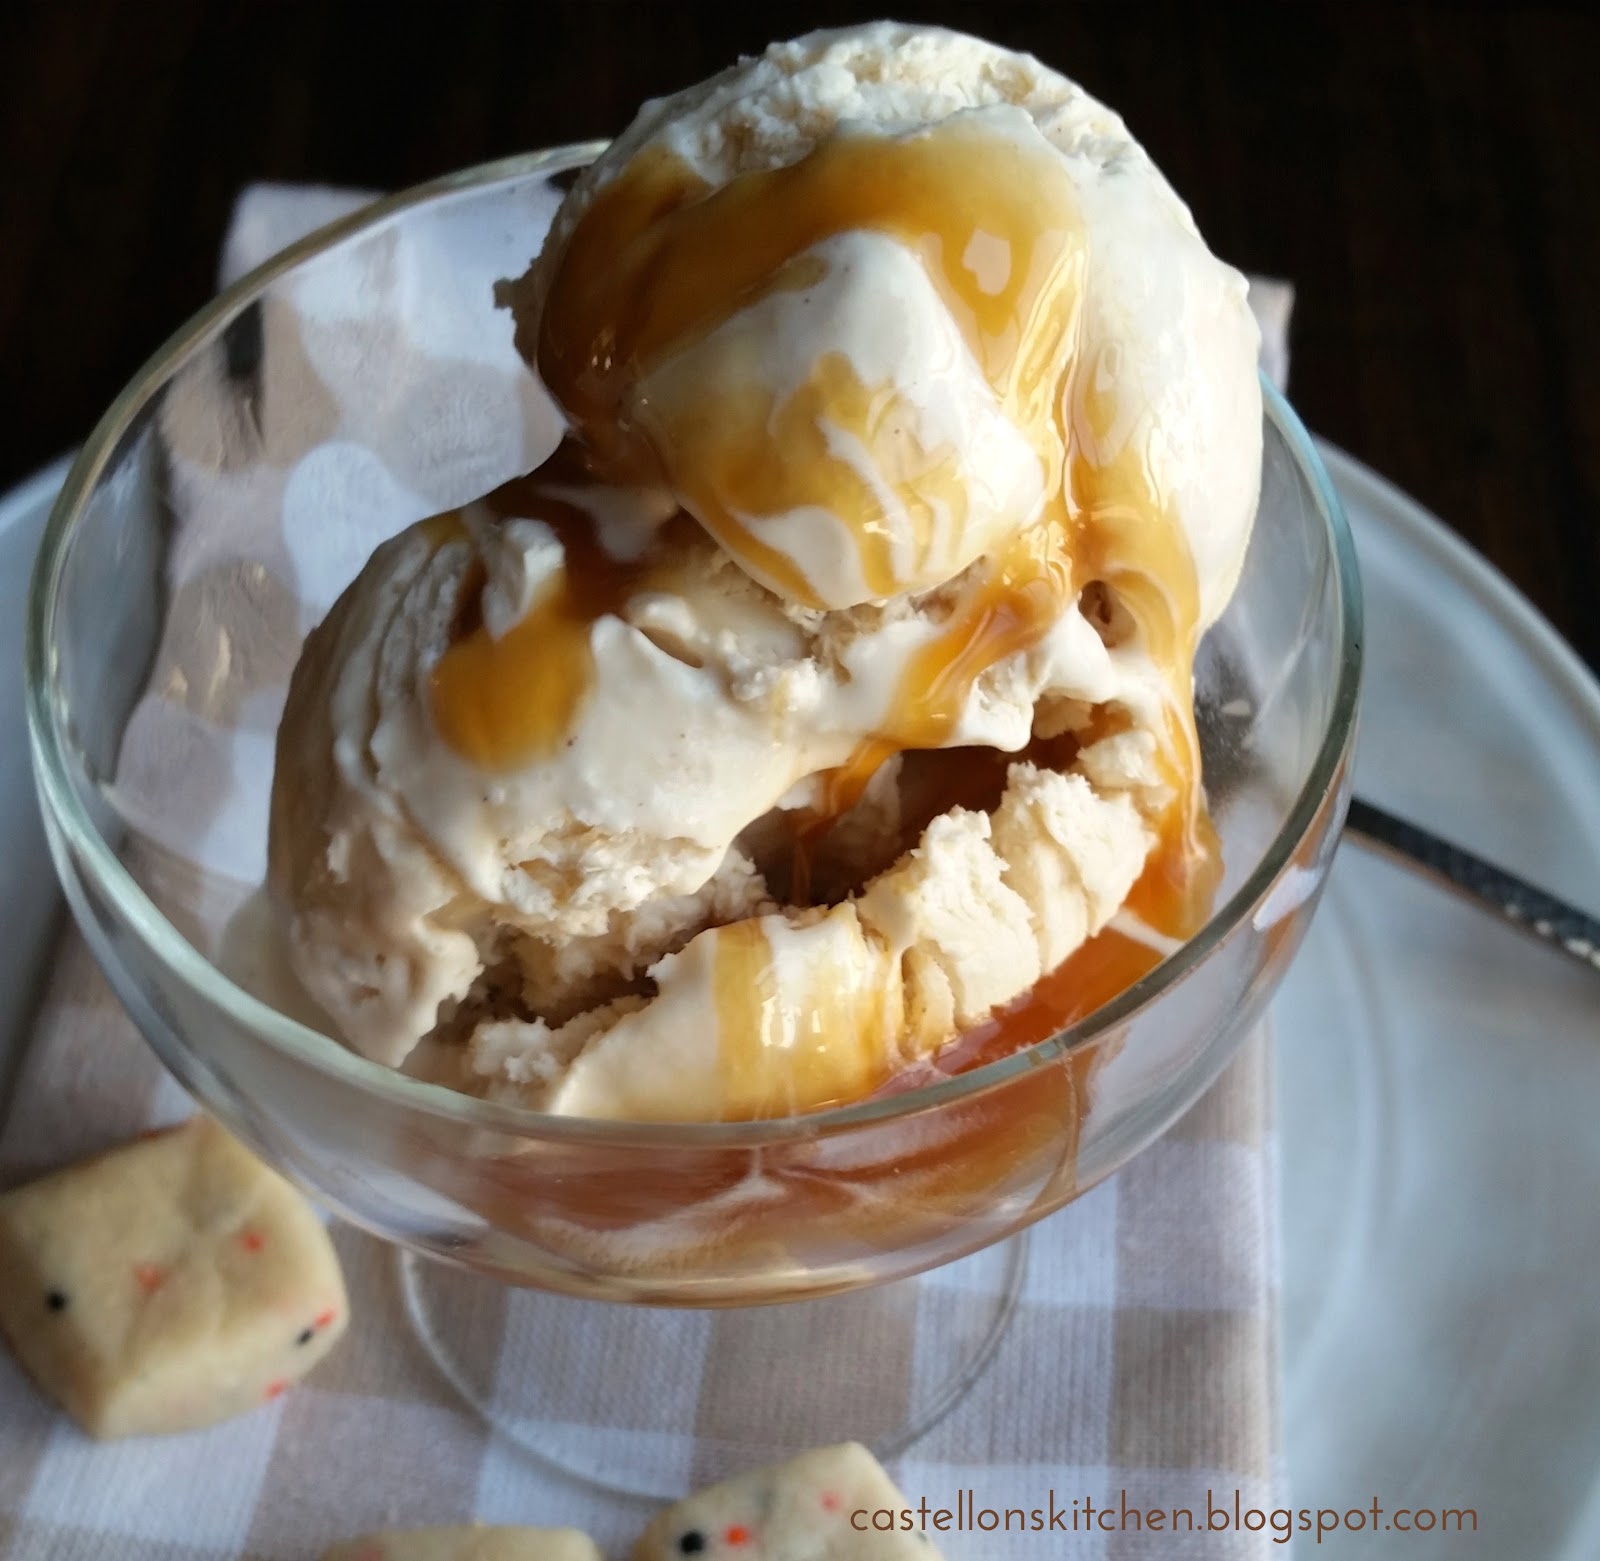
Anyway, back to the ice cream...It's delicious all by itself or topped with your favorite sauce. I drizzled mine with caramel but you can skip the caramel sauce and serve it a la mode with pumpkin pie. Can you imagine...pumpkin pie with pumpkin spice latte ice cream? Yummy. 
Another great thing about this recipe is that it's versatile. You can use just about any flavored coffee...mocha latte, vanilla, peppermint spice and even hazelnut coffee. The combinations are endless. Stay cool and enjoy!


Pumpkin Spice Latte Ice Cream

Adapted recipe from Tip Hero via Facebook
Serves 4-6

2 1/2 cups Whipping Cream

1 can of Sweetened Condensed Milk

5-6 t. Maxwell House International Pumpkin Spice Latte Instant Coffee/Creamer, dissolved in 1/2 cup of regular coffee and then cooled to room temperature.

Mix 5-6 heaping teaspoons of Maxwell House International Pumpkin Spice Latte instant coffee into 1/2 cup regular hot coffee. Stir until fully dissolved. Place coffee in refrigerator to cool about 20 minutes. (I made my instant coffee mixture the night before so it would be ready in the morning.)

In a large bowl add condensed milk and coffee and whipping cream. Using a hand mixer, whip ice cream mixture until fluffy peaks are stiff. ~5 minutes. 


Pour mixture into a freezer safe dish and cover with plastic wrap and freeze 8 hours or overnight. Scoop, top with your favorite sauce, and Enjoy!


Other desserts to try:
                      Pumpkin Pie Cupcakes          Cinnamon Cheesecake Cookies


Wednesday, October 7, 2015

Monster Morsels

I know I probably say this every time I make a dessert for the blog, but I'm not much of a dessert person. I used to be when I was in my teens and twenties but sometime in the last 20 years, I've lost my taste for the sweet stuff. 
Give me a meal with salad and I'm good, but occasionally I do crave a little something sweet, like chocolate or cheesecake, but my favorite cookie would have to be SHORTBREAD, hands down!
Buttery, delicious and not too sweet! This is definitely my kind of dessert! I seriously could eat these little morsels every morning with a cup of coffee. If I hadn't taken these little bites of wonderful to school for a PTA meeting, I would of eaten every single last one all by myself. I already ate two dozen right out of the oven!
Make a big batch of them and watch your little monsters devour them!

Happy Halloween!


Monster Morsels (Mini Shortbread Cookies) 

Boo! Bites recipe from Seeded at the Table

Makes ~9 dozen bite-sized cookies

1 cup unsalted butter, room temperature
1/2 cup granulated sugar
1/2 t vanilla extract
2 1/2 cup all purpose flour
1/2 t salt
2 T nonpareils Halloween sprinkles

Preheat oven to 325 degrees.
Cream together butter and sugar and add vanilla. Add flour and salt to stand mixer and mix on low until incorporated. Stir in the Halloween sprinkles by hand until evenly distributed.
On parchment paper, form dough into a rectangle. I used the edge of a spatula to square off the edges. Then I used a regular rolling pin to smooth out the surface of the dough.

I decided to fancy up this deliciously simple cookie recipe by using my super cool engraved rolling pin that my mom gave me last year. I think they turned out pretty neat. Don't you? 
(Thanks mom! XO)


Use a pizza cutter to cut the dough into 1 inch cookies. Place cookies one inch apart on parchment lined cookie sheet and bake for 13-15 minutes at 325 degree oven. Cool and enjoy!


Other Halloween Desserts to try:
Black Velvet Creme Cakes  Candy Corn Sugar Cookies  Zombie Pretzel Cookies


Saturday, October 3, 2015

Spicy Roasted Cauliflower

I had this idea to make a Halloween inspired dish from cauliflower because lets face it, it looks like brains. Perfect Halloween material right? I figured there's a great side dish or salad in the making. The problem is, cauliflower pretty much tastes like water. Not much flavor going on. It's like chunky H2O. Unless you smother it in a cheese sauce or salad dressing it's pretty bland. This recipe however is the farthest thing from bland-ville.

The cauliflower is roasted and basted in a sweet, spicy, and garlicky sauce that's so delicious that even my husband loved it and he is NOT a fan of cauliflower...he had two servings.  

Slicing the cauliflower into flat patties does a few things. One it makes them look like cross-sections of cerebrums. Which is way cool and creepy for a Halloween inspired side dish. Two, it helps infuse the sauce better because the florets are smaller bites of cauliflower. And three, it makes for quick, easy, and even roasting. 


This recipe was so yummy and the pictures turned out so beautiful that the plating doesn't look much like a Halloween dish. But like all my Halloween recipes, they can be made any time of the year, not just for Halloween, just change up the plating to de-Halloween-ify it.

This would be a perfect side dish with my Midnight Sushi with Wasabi Skulls and a cool Fangtini. Enjoy!


Roasted Brains (Spicy Roasted Cauliflower)

Serves 4


1 head of Cauliflower, florets cut into thin flats of cauliflower

1/4 cup vegetable oil
1 T toasted sesame oil
3 T soy sauce
3-4 T sriracha (to taste)
1 clove garlic, finely minced (I used Dorot garlic cubes)
juice of one lime
2 T honey
green onions (garnish)
black sesame seeds(garnish)

Preheat oven to 450 degrees.

In a small bowl, mix vegetable and sesame oils, soy sauce, sriracha, garlic, and lime juice and give a quick stir. Note: The honey is not added at this point to prevent the sauce from burning during roasting. The honey will be added to the leftover sauce after basting the cauliflower. 

On a parchment lined cookie sheet, place cauliflower florets in a single layer. Baste one side of cauliflower flats with spicy sauce (with no honey added). Set leftover sauce aside.


Roast 450 degrees for 20-25 minutes. 


Add the honey to the leftover sauce and mix well. Add additional sriracha if desired. Or if you didn't have much remaining, make a new batch of sauce, this time adding all the ingredients at one time. 

Remove cauliflower from the oven and baste generously with the spicy sauce with honey. Transfer to a bowl or platter garnish with green onions and black sesame seeds and Enjoy!


Other Halloween recipes to try: 
Love at First Bite Linguini               Black Magic Spellcakes               Midnight Sushi

Tuesday, September 15, 2015

Zombie Pretzel Cookies


It's time for a super cute and fun ZOMBIE cookie using Rold Gold Pretzel Thins! I made these fun pretzel dipped cookies despite my last promise to NEVER, EVER MAKE ANYTHING WITH THOSE DREADFUL CANDY MELTS! However...my competitive nature lured me back to give it another go.  I just could not let those confectionery buggers get the best of me. 
This is a terrific recipe for the "melting chocolate challenged" folks, like me because they don't have to be perfect! They're Zombies! They're supposed to look cock-eyed and a little disheveled. My kids loved them, said they tasted like Mother's Circus Animal Cookies! That's a win in my book!...not that I'm keeping score or anything.


Castellon's Kitchen-1(Yay!)   Candy Melts-2


Zombie Pretzel Cookies 

(Makes 12)

12 Rold Gold Pretzels, Pretzel Thins

1/2 bag of light green candy melts plus 3 chips of black to darken the green to a moldy hue

black melting chocolate

red melting chocolate

white melting chocolate

24 candy eyeballs

Chocolate jimmies

Prepare the Zombie Eyes:
From the pack of Candy eyeballs, pick out the misshaped candy eyeballs and some that are off-center. Pair these wonky ones with the small perfect eyeballs. Mixing the big and the small eyeballs will make for great zombie eyes. Set aside.
Now, place 10 or so black candy melts chips in a small zippered sandwich bag and melt in microwave for one minute at half power. Knead until melted.  Cut small hole into a corner of the plastic bag. On a separate piece of parchment paper, Squeeze out small dots of black chocolate and then place a candy eyeball onto the black chocolate. Refrigerate until set.
 
Prepare Zombie Teeth:
Melt two white chocolate chips on a piece of parchment for about 20 seconds in the microwave. Using a butter knife, smooth out the chocolate into a thin coating. Let harden. Using a sharp knife, cut white chocolate into small irregular squares. These will be the zombie teeth. It's okay if they break or look jagged, that adds to the zombie feel of the cookies. Plus you can now proudly state that they're supposed to look like that and not worry that you've done them wrong. We'll call it dramatic license. :)

Prepare Zombie Dipping Chocolate:

Prepare the moldy green chocolate by heating 1/2 bag of light green chips plus 3 chips of black in a small bowl, according to package directions. Add 1/2 T of shortening if you need to thin the chocolate out a bit. 
Once thoroughly melted, drop pretzels in one at a time and use a fork lift it out of the chocolate. Gently tap the fork on the side of the bowl to shake off extra chocolate. 


Place chocolate covered pretzel on a parchment lined cookie sheet. Repeat with remaining pretzels. 
While the chocolate is still wet, sprinkle tops of pretzels with chocolate jimmies to create the zombie hair. 

Next, place your Zombie eyes into the wet chocolate. Don't worry if your chocolate covered pretzel has hardened, simply scoop a tablespoon of your moldy green chocolate from your bowl into a zippered sandwich bag and melt in microwave. Dot a small amount of the green chocolate on the pretzel and place the zombie eyes. Ta-Dah!

Zombie Mouth:
Place 10-12 chips of red melting chocolate into a zippered sandwich bag and melt for about 30 seconds at half power. Knead until melted, heating as necessary. Cut a small corner of the bag and pipe a small line of red chocolate to make the mouth. Using a toothpick, place 3-5 zombie teeth into the red chocolate. Again, if they look goofy and caddiwampus...Dramatic license! Just repeat these words as you place the teeth..."BRAINS!...I NEED BRAINS!"

Get your kiddos into the Halloween spirit and make mobs of these undead cookies! Enjoy! Happy Halloween!